
When it comes to teaching, preparing classroom activities and lessons is just as important as the actual process of teaching the material. Teachers put a lot of time and effort into these preparations, so it’s always nice to stumble upon a tool that can make the entire process faster and more convenient.
Many teachers use visual aids in their presentations. And instead of saving these pictures one by one in folders all over the place, it’s good to convert them into PDFs for convenient archiving. If a time comes when a teacher might want to reuse these images, then it would be really helpful to find a way to extract these old images from PDFs and restore them as image files so that they can be used conveniently in a class lesson once again.
One fantastic productivity tool that can help in such a process is Able2Extract PDF Converter . This software enables users to convert PDFs into editable formats such as Microsoft Word, Excel, PowerPoint, and many others that can be very useful for teachers in everyday situations. Among the many conversion options available, Able2Extract can also extract images from PDFs. As a matter of fact, Able2Extract comes in two versions: Standard and Professional, with the latter one using the latest OCR technology and enabling users to convert scanned PDFs. It’s the best solution for working with PDFs and images that were scanned into an electronic format from paper.
Here is a step-by-step guide that will help you see how easy this software is to use when trying to pull images out of PDFs for reuse in the classroom. We are using the Professional version of Able2Extract in this how-to guide, but if you are working with native PDFs (created from an electronic source, not scanned), you can use any version of the Able2Extract PDF Converter.
Start up the software and then click on the “Open” button to locate the PDF from which you want the images extracted.

If you want to extract all of the images found in the PDF, you can click on the “All” button.

However, Able2Extract also gives you pinpoint conversion options to convert only the images that you need at the moment, which is an additional timesaver in the process. To do this, click “Area” and then select with your mouse the pictures you want to extract.
Now that the images are selected, click on “Image” to extract the pictures from the PDF.

You will now have a number of options to select what image format you want to convert the pictures into. Able2Extract supports JPEG, TIFF, GIF, BMP and PNG image formats. You can make additional customizations to your output here as well.
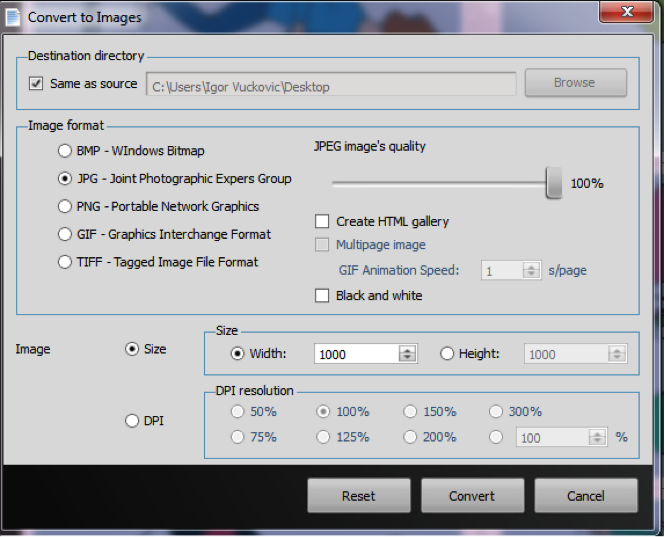
Once you have chosen your conversion options, click the “Convert” button. In a matter of moments, you will receive your new image file that has been extracted from your PDF.
The software’s ability to extract images can really come in handy in the classroom, but its other conversion options are just as useful for teachers. For example, you can use Able2Extract Professional 8 to convert old, archived tests from PDF into MS Word files to use again, convert multiplication tables from PDF into editable Excel spreadsheets, turn PDF presentations into reusable PowerPoint slides, and much more.
